Ever tried uploading a profile picture only to realize afterward that it wasn’t quite right? You’re not alone. According to UX research by NNGroup, nearly 1 in 5 user frustrations comes from confusing or limited upload experiences. That’s a big deal—especially considering how common file uploads are on the web.
Imagine running an online shop or setting up a profile page. Wouldn’t it be helpful if users could preview their images before submitting? A live image preview gives users instant feedback, builds confidence, and creates a smoother experience.
In this tutorial, we’ll walk through how to implement a clean, interactive image upload feature with live preview using jQuery. It’s beginner-friendly, reusable, and adds a polished touch to any website.
HTML: Building the Upload Interface
We’ll start by creating a simple HTML structure that handles image selection and preview.
 1
 2
 3
 4
 5
 6
 7
 8
 9
10
11
| <!-- Single image upload component -->
<div class="image_file">
<label>
<span class="upload"><img src="images/image_file_upload.png" alt="이미지 업로드"></span>
<input type="file" class="file_input" accept="image/*">
</label>
<div class="preview">
<span class="img_box"><img class="preview_img" src="#" alt="Selected Image"></span>
<button type="button" class="delect"><img src="images/image_file_delect.png" alt="삭제"></button>
</div>
</div>
|
What this does:
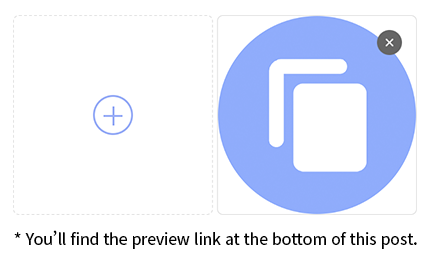
.image_file: Wraps everything into a neat upload module.- Clicking the label opens the file picker.
.upload shows an icon to encourage users to select a file..file_input: The hidden input that accepts image files only..preview: Displays the selected image and a delete button.
Want to allow multiple uploads? Just duplicate the entire .image_file block. Each one works on its own.
CSS: Styling the Upload Box and Preview
Next, we’ll use some simple CSS to style the upload area and make it intuitive to interact with.
 1
 2
 3
 4
 5
 6
 7
 8
 9
10
| .image_file { position: relative; width: 200px; height: 200px; margin: 150px auto 0; }
.image_file label { display: block; height: 100%; cursor: pointer; }
.image_file .upload { display: flex; height: 100%; border: 1px dashed #E5E5E5; border-radius: 6px; justify-content: center; align-items: center; background: #FFFFFF; }
.image_file .upload img { width: 40px; height: 40px; }
.image_file .file_input { position: absolute; width: 1px; height: 1px; margin: -1px; font-size: initial; overflow: hidden; clip: rect(0, 0, 0, 0); }
.image_file .preview { display: none; position: absolute; top: 0; left: 0; width: 100%; height: 100%; }
.image_file .preview .img_box { display: block; height: 100%; border: 1px solid #E5E5E5; border-radius: 6px; background: #FFFFFF; cursor: pointer; }
.image_file .preview .preview_img { width: 100%; height: 100%; object-fit: cover; }
.image_file .preview .delect { position: absolute; top: 15px; right: 15px; width: 25px; height: 25px; padding: 0; border: none; background: none; cursor: pointer; }
.image_file .preview .delect img { width: 100%; }
|
Design tips:
- Flexbox helps center the icon inside the box.
object-fit: cover makes sure the image fills the preview box neatly.
jQuery: Bringing the Preview to Life
Now for the fun part. With just a few lines of jQuery, we can show a preview as soon as the user selects an image, and allow them to remove it if needed.
 1
 2
 3
 4
 5
 6
 7
 8
 9
10
11
12
13
14
15
16
17
18
19
20
21
22
23
24
25
26
27
28
29
30
31
32
33
34
35
36
37
38
39
40
41
42
43
44
45
46
47
48
49
50
51
52
53
54
55
56
57
58
59
60
61
| $(document).ready(function(){
imageFileUpload();
});
// Initialize image upload and preview functionality
function imageFileUpload() {
$('.image_file .delect').on('click', handleDeleteClick); // Handle delete button click
$('.image_file .file_input').on('change', handleFileInputChange); // Handle file input change
// When preview image is clicked, trigger file input click
$('.image_file .preview_img').on('click', function() {
$(this).closest('.image_file').find('.file_input').click();
});
// Handle file selection and update preview
function handleFileInputChange() {
const file = this.files[0];
const previewContainer = $(this).closest('.image_file').find('.preview');
const previewImage = previewContainer.find('.preview_img');
if (file) {
const reader = new FileReader();
reader.onload = (e) => {
previewImage.attr('src', e.target.result); // Set preview image
previewContainer.show(); // Show preview box
previewContainer.closest('.image_file').find('.upload').hide(); // Hide upload button
};
reader.readAsDataURL(file); // Read file as Data URL
} else {
resetPreview(previewContainer); // Reset if no file selected
}
// Update file count display (if in a modal with multiple file inputs)
let file_cnt = 0;
$('.file_select_pop .file_input').map(function(){
if($(this).val()) file_cnt++;
});
$('.file_select_pop .file_cnt').html(file_cnt);
}
// Handle delete button click: reset preview and file input
function handleDeleteClick() {
const previewContainer = $(this).closest('.preview');
resetPreview(previewContainer);
// Update file count display
let file_cnt = 0;
$('.file_select_pop .file_input').map(function(){
if($(this).val()) file_cnt++;
});
$('.file_select_pop .file_cnt').html(file_cnt);
}
// Reset the preview UI and clear the selected file
function resetPreview(previewContainer) {
const imageFileContainer = previewContainer.closest('.image_file');
imageFileContainer.find('.file_input').val(''); // Clear file input
previewContainer.hide(); // Hide preview box
imageFileContainer.find('.upload').show(); // Show upload button again
}
}
|
How it works:
FileReader is a browser API that lets us read the file directly from the user’s device.readAsDataURL() turns the file into a base64-encoded string we can use in the src attribute of an image tag.- We also add a handy trick: clicking the preview image will reopen the file picker so users can swap the image easily.
Final Thoughts
Adding a live preview to your image upload flow might seem like a small detail—but it makes a big impact. It reduces user mistakes, improves clarity, and makes your app feel polished and professional.
Want to take it to the next level?
- Add drag-and-drop support.
- Use Cropper.js to let users trim images before upload.
- Add file size or dimension validation to prevent issues later.
Every small upgrade to your user interface builds trust and delight. Try this feature in your next project, and see how much smoother the experience feels. Got questions or want to show off what you built? Let us know in the comments!
