Swiper 플러그인을 사용하여 같은 클래스명을 가진 여러 개의 슬라이드를 반응형으로 만드는 방법입니다.
슬라이드의 개수가 많아져도 유지보수가 편리하도록 코드를 구성하였습니다.
HTML 구조
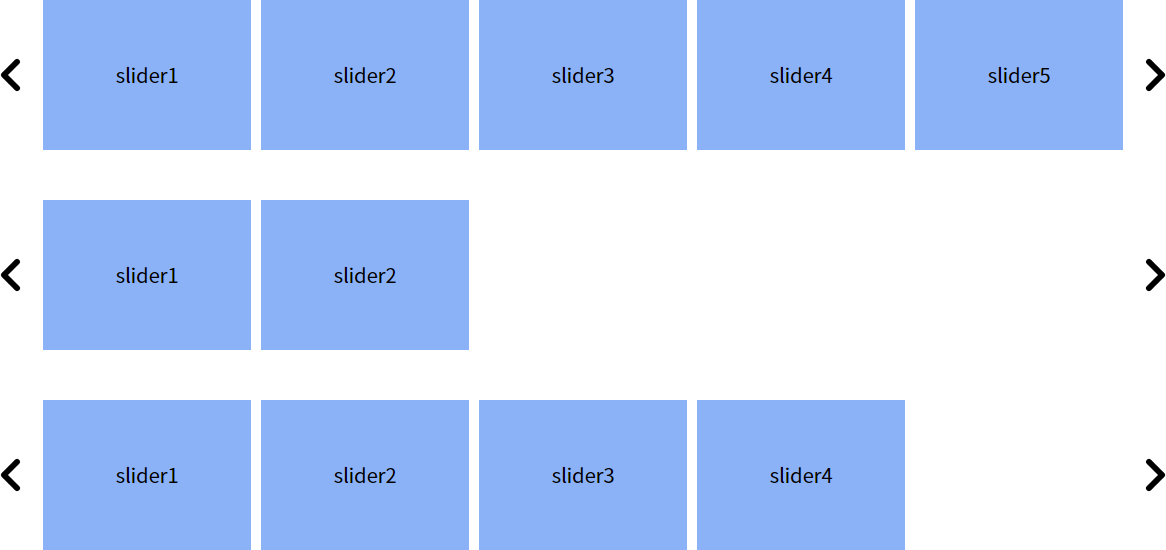
먼저, 각 슬라이드를 .slider 클래스로 감싼 뒤 내부에 슬라이드 아이템들을 넣습니다.
각 슬라이드는 이전 및 다음 버튼을 포함하고 있습니다.
 1
 2
 3
 4
 5
 6
 7
 8
 9
10
11
12
13
14
15
16
17
18
19
20
21
22
23
24
25
26
27
28
29
30
31
32
33
34
35
36
37
38
39
40
41
42
| <!-- 첫번째 슬라이드 -->
<div class="slider">
<div class="inner">
<ul class="swiper-wrapper slide_list">
<li class="swiper-slide">slider1</li>
<li class="swiper-slide">slider2</li>
<li class="swiper-slide">slider3</li>
<li class="swiper-slide">slider4</li>
<li class="swiper-slide">slider5</li>
<li class="swiper-slide">slider6</li>
</ul>
</div>
<span class="btn btn_prev">이전</span>
<span class="btn btn_next">다음</span>
</div>
<!-- 두번째 슬라이드 -->
<div class="slider">
<div class="inner">
<ul class="swiper-wrapper slide_list">
<li class="swiper-slide">slider1</li>
<li class="swiper-slide">slider2</li>
</ul>
</div>
<span class="btn btn_prev">이전</span>
<span class="btn btn_next">다음</span>
</div>
<!-- 세번째 슬라이드 -->
<div class="slider">
<div class="inner">
<ul class="swiper-wrapper slide_list">
<li class="swiper-slide">slider1</li>
<li class="swiper-slide">slider2</li>
<li class="swiper-slide">slider3</li>
<li class="swiper-slide">slider4</li>
</ul>
</div>
<span class="btn btn_prev">이전</span>
<span class="btn btn_next">다음</span>
</div>
|
CSS 스타일
스타일은 슬라이드 컨테이너와 슬라이드 아이템들에 적용됩니다.
1
2
3
4
5
6
| .slider {overflow: hidden;position: relative;max-width: 1180px;margin: 50px auto 0;}
.slider .inner {overflow: hidden;margin: 0 50px;}
.slide_list > li {width: 20%;height: 150px;background: #8ab4f8;font-size: 20px;line-height: 150px;text-align: center;}
.slider .btn {position: absolute;top: 50%;width: 35px;height: 35px;background:url('images/arrow.png') center center no-repeat;background-size: cover;text-indent: -999em;cursor: pointer;}
.slider .btn.btn_prev {left: 0;transform: rotateY(180deg) translate(0,-50%);}
.slider .btn.btn_next {right:0;transform: translate(0,-50%);}
|
jQuery 코드
각 슬라이드에 Swiper를 적용하고, 반응형을 처리하기 위해 윈도우의 리사이즈 이벤트를 감지합니다.
이를 위해 .each() 메서드를 사용합니다.
 1
 2
 3
 4
 5
 6
 7
 8
 9
10
11
12
13
14
15
16
17
18
19
20
21
22
23
24
25
26
27
28
29
30
31
32
33
34
35
36
37
38
39
40
41
42
43
44
45
46
47
48
49
50
51
52
53
54
55
56
| $(window).on('load', function () {
slider();
})
function slider(){
$(".slider").each(function(index){
let $this = $(this);
let swiper = undefined;
let slideNum = $this.find('.swiper-slide').length //슬라이드 총 개수
let slideInx = 0; //현재 슬라이드 index
//디바이스 체크
let oldWChk = window.innerWidth > 768 ? 'pc' : 'mo';
sliderAct();
$(window).on('resize', function () {
let newWChk = window.innerWidth > 768 ? 'pc' : 'mo';
if(newWChk != oldWChk){
oldWChk = newWChk;
sliderAct();
}
})
function sliderAct(){
//슬라이드 인덱스 클래스 추가
$this.addClass(`slider${index}`);
//슬라이드 초기화
if (swiper != undefined){
swiper.destroy();
swiper = undefined;
}
//slidesPerView 옵션 설정
let viewNum = oldWChk == 'pc' ? 5 : 2;
//loop 옵션 체크
let loopChk = slideNum > viewNum;
swiper = new Swiper(`.slider${index} .inner`, {
slidesPerView: viewNum,
initialSlide :slideInx,
spaceBetween: 10,
slidesPerGroup: 1,
loop: loopChk,
navigation: {
prevEl: $(`.slider${index} .btn_prev`)[0],
nextEl: $(`.slider${index} .btn_next`)[0],
},
on: {
activeIndexChange: function () {
slideInx = this.realIndex; //현재 슬라이드 index 갱신
}
},
});
}
});
}
|
로드 이벤트와 slider() 함수 정의 :
페이지 내의 모든 리소스가 완전히 로드된 이후에 slider() 함수를 호출합니다. 이 함수는 슬라이드 초기화와 관련된 작업을 수행합니다.
각 슬라이드 순회 :
페이지 내의 .slider 클래스를 가진 요소들을 하나씩 선택하여 각 슬라이드에 대한 설정을 수행합니다. 이를 위해 .each() 함수를 사용하여 반복문을 통해 슬라이드를 하나씩 처리합니다.
현재 슬라이드 요소와 변수 설정 :
각 슬라이드를 처리하면서, 현재 슬라이드 요소를 $this로 저장하고, swiper 변수를 초기화합니다. slideNum 변수는 슬라이드 내의 슬라이드 아이템 개수를 저장하며, slideInx는 현재 활성화된 슬라이드의 인덱스를 추적합니다. oldWChk는 현재 디바이스 유형을 판별하는 역할을 합니다.
슬라이드 초기화 함수와 윈도우 리사이즈 이벤트 :
sliderAct() 함수를 호출하여 슬라이드를 초기화합니다. 또한, 윈도우의 크기가 변경될 때마다 슬라이드 설정을 다시 수행하는 이벤트 핸들러를 등록합니다. 이를 통해 화면 크기 변화에 대응하는 반응형 슬라이드를 구현할 수 있습니다.
슬라이드 초기화 함수 :
sliderAct() 함수 내에서는 현재 슬라이드에 고유한 클래스명을 추가하고, 이전에 생성된 Swiper 인스턴스를 제거하고 초기화합니다. 또한, 슬라이드 아이템 개수와 화면 크기에 따라 보여지는 슬라이드 아이템 개수 등을 설정합니다.
Swiper 인스턴스 옵션 설정 :
swiper 변수에 새로운 Swiper 인스턴스를 생성하며, 초기 옵션을 설정합니다. 슬라이드 개수, 초기 활성화 슬라이드, 여백, 무한 반복 여부, 네비게이션 버튼 등의 옵션을 지정하여 슬라이드 동작을 설정합니다.
결론
위의 코드 예제를 활용하면 Swiper를 사용하여 여러 개의 슬라이드를 쉽게 관리하고 반응형으로 만들 수 있습니다.
.each() 메서드를 이용하여 각 슬라이드를 초기화하고 처리하며, 윈도우의 리사이즈 이벤트를 활용하여 반응형을 제공할 수 있습니다.