Featured image of post jQuery - Swiper 갤러리 슬라이드 (반응형)

jQuery - Swiper 갤러리 슬라이드 (반응형)

Swiper.js 플러그인을 활용한 갤러리 형태의 반응형 슬라이드 코드 예제입니다.

Swiper.js 플러그인을 활용하여 갤러리 형태의 슬라이드를 만들었다.
공식 사이트에도 갤러리 형태의 예제가 있지만, 무한 반복과 반응형을 추가하기 위해 코드를 수정했다.
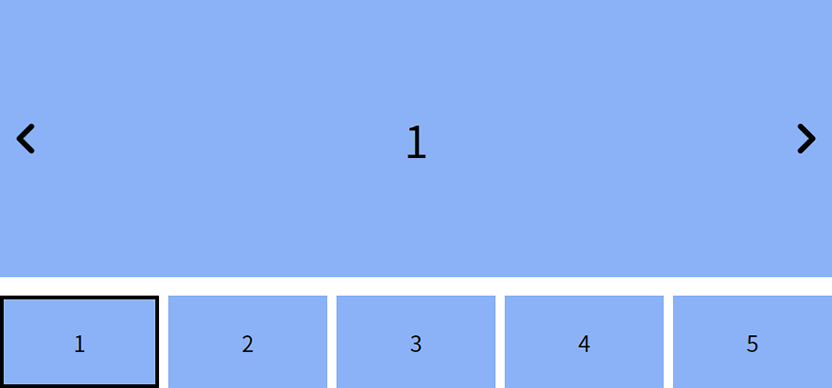
이 예제는 PC에서는 작은 이미지의 썸네일이 5개, 모바일에서는 3개가 보이는 형태로 구현되어 있다.

HTML 구조

 1
 2
 3
 4
 5
 6
 7
 8
 9
10
11
12
13
14
15
16
17
18
19
20
21
22
23
24
25
26
27
28
29
30
31
<div class="gallery">
    <!-- 메인 슬라이드 -->
    <div class="list">
        <div class="inner">
            <ul class="swiper-wrapper slide_list">
                <li class="swiper-slide">1</li>
                <li class="swiper-slide">2</li>
                <li class="swiper-slide">3</li>
                <li class="swiper-slide">4</li>
                <li class="swiper-slide">5</li>
                <li class="swiper-slide">6</li>
                <li class="swiper-slide">7</li>
            </ul>
            <span class="btn btn_prev">이전</span>
            <span class="btn btn_next">다음</span>
        </div>
    </div>

    <!-- 갤러리 썸네일 -->
    <div class="thumbs">
        <ul class="swiper-wrapper slide_list">
            <li class="swiper-slide">1</li>
            <li class="swiper-slide">2</li>
            <li class="swiper-slide">3</li>
            <li class="swiper-slide">4</li>
            <li class="swiper-slide">5</li>
            <li class="swiper-slide">6</li>
            <li class="swiper-slide">7</li>
        </ul>
    </div>
</div>

.gallery 안에는 .list 슬라이드와 .thumbs 슬라이드가 각각 구현되어 있다.
.list 슬라이드(메인 슬라이드)는 큰 이미지를 보여주며, .thumbs 슬라이드는 작은 썸네일을 보여준다.

CSS 스타일

 1
 2
 3
 4
 5
 6
 7
 8
 9
10
11
.gallery {overflow: hidden;position: relative;max-width: 900px;margin: 40px auto 0;}
.gallery .list .inner {position: relative;}
.gallery .list .slide_list > li {display: flex;justify-content: center;align-items: center;height:300px;background: #8ab4f8;font-size: 48px;opacity: 0 !important;}
.gallery .list .slide_list > li.swiper-slide-active {opacity: 1 !important;} 
.gallery .list .btn {position: absolute;top: 50%;width: 35px;height: 35px;background:url('images/arrow.png') center center no-repeat;background-size: contain;text-indent: -999em;z-index: 1;}
.gallery .list .btn.btn_prev {left: 10px;transform:translate(0,-50%) rotateY(180deg);}
.gallery .list .btn.btn_next {right: 10px;transform: translate(0,-50%) ;}

.gallery .thumbs {margin-top: 20px;}
.gallery .thumbs .slide_list > li {display: flex;justify-content: center;align-items: center;position: relative;height:100px;background: #ddd;background: #8ab4f8;font-size: 24px;cursor: pointer;}
.gallery .thumbs .slide_list > li.swiper-slide-thumb-active:before {content:'';position: absolute;top: 0;right: 0;bottom: 0;left: 0;border: 4px solid #000;z-index: 1;}

.swiper-slide-thumb-active를 활용하여 현재 활성화된 썸네일에 선을 추가하여 사용자가 메인 슬라이드 이미지와 연관된 썸네일을 쉽게 확인할 수 있도록 만들었다.

jQuery 코드

 1
 2
 3
 4
 5
 6
 7
 8
 9
10
11
12
13
14
15
16
17
18
19
20
21
22
23
24
25
26
27
28
29
30
31
32
33
34
35
36
37
38
39
40
41
42
43
44
45
46
47
48
49
50
51
52
53
54
55
56
57
58
59
60
61
62
63
64
65
$(window).on('load', function() {
    gallery();
});

function gallery() {
    let list = undefined;
    let thumbs = undefined;
    const slideNum = $('.gallery .list .swiper-slide').length; // 슬라이드 총 개수
    let slideInx = 0; // 현재 슬라이드 index
    let viewNum = 0;
    let loopChk = true;

    // 디바이스 체크
    let oldWChk = window.innerWidth > 767 ? 'pc' : 'mo';
    sliderAct();

    $(window).on('resize', function() {
        const newWChk = window.innerWidth > 767 ? 'pc' : 'mo';
        if (newWChk !== oldWChk) {
            oldWChk = newWChk;
            sliderAct();
        }
    });

    // 슬라이드 실행
    function sliderAct() {
        // 슬라이드 초기화
        [list, thumbs].forEach(item => item && item.destroy());

        // slidesPerView 옵션 설정
        viewNum = oldWChk === 'pc' ? 5 : 3;
        // loop 옵션 체크
        loopChk = slideNum > viewNum;

        // 갤러리 썸네일
        thumbs = new Swiper(".gallery .thumbs", {
            spaceBetween: 10,
            slidesPerView: viewNum,
            loopedSlides: viewNum,
            loop: loopChk,
            watchSlidesVisibility: true,
            watchSlidesProgress: true,
        });

        // 메인 슬라이드
        list = new Swiper(".gallery .list .inner", {
            initialSlide: slideInx,
            loopedSlides: viewNum,
            loop: loopChk,
            effect: "fade",
            navigation: {
                nextEl: ".gallery .btn_next",
                prevEl: ".gallery .btn_prev",
            },
            on: {
                activeIndexChange: function() {
                    slideInx = this.realIndex; // 현재 슬라이드 index 갱신
                }
            },
            thumbs: {
                swiper: thumbs,
            },
        });
    }
}

두 개의 형태의 슬라이드를 만들고, 참고 코드를 활용하여 반응형과 무한 반복 옵션을 해결했다. 또한 thumbs 옵션을 사용하여 두 개의 슬라이드를 연동시켰다. 그리고 loopedSlides 옵션을 활용하여 썸네일 슬라이드 끝에 도달했을 때 자연스럽게 넘어갈 수 있도록 조정했다. loopedSlides 옵션은 무한 반복 효과를 위해 가상의 슬라이드 개수를 설정하는 옵션이다. 코드는 다음과 같은 구성 요소로 이루어져 있다.

  • list, thumbs :
    Swiper 객체를 저장한다.

  • slideNum :
    메인 슬라이드에 있는 모든 슬라이드 개수를 저장한다.

  • slideInx :
    현재 슬라이드의 인덱스를 저장한다.

  • viewNum :
    화면 크기에 따라 보여줄 슬라이드 개수를 저장한다.

  • loopChk :
    슬라이드 개수가 보여줄 슬라이드 개수보다 많을 때 무한 루프를 사용할지 여부를 저장한다.

  • thumbs = new Swiper(".gallery .thumbs", { … }) :
    갤러리 썸네일을 위한 Swiper 객체를 생성한다.

  • list = new Swiper(".gallery .list .inner", { … }) :
    메인 슬라이드에 대한 Swiper 객체를 생성한다.

  • thumbs: { swiper: thumbs } :
    메인 슬라이드에 썸네일 Swiper 객체를 연결한다. 썸네일 슬라이드와 메인 슬라이드가 동기화되어 썸네일을 클릭하면 해당 이미지가 메인 슬라이드에 표시된다.


comments powered by Disqus
Hugo로 만듦
JimmyStack 테마 사용 중