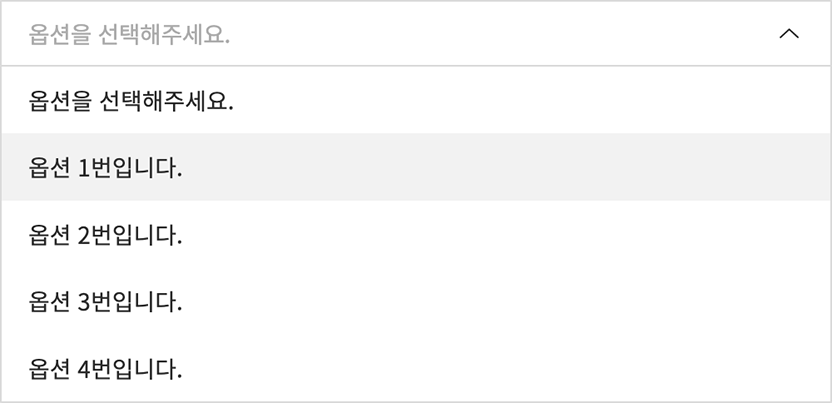
select 태그의 CSS 커스텀은 제한적이기 때문에, 원하는 디자인을 구현하기 위해서는 ul 태그를 사용하여 옵션 목록을 작성한 후, jQuery를 사용하여 select 동작을 추가해야 한다.
그리고 select 옵션 데이터값을 전달하기 위해 input hidden 태그를 활용했다.
HTML 코드
 1
 2
 3
 4
 5
 6
 7
 8
 9
10
11
12
13
14
| <div class="select_cus">
<input type="hidden" class="opt_val" value="">
<div class="trigger">
<span class="trigger_txt">옵션을 선택해주세요.</span>
</div>
<ul class="option">
<li data-value="">옵션을 선택해주세요.</li>
<li data-value="option1">옵션 1번입니다.</li>
<li data-value="option2">옵션 2번입니다.</li>
<li data-value="option3">옵션 3번입니다.</li>
<li data-value="option4">옵션 4번입니다.</li>
<li data-value="option5">옵션 5번입니다.</li>
</ul>
</div>
|
.select_cus는 select 태그, .trigger는 선택된 option 태그, .option의 li는 옵션 목록을 의미한다.
data-value 속성의 값은 실제 데이터값을 나타내며, jQuery를 사용하여 선택된 data-value 값을 input hidden 태그에 할당할 예정이다.
CSS 스타일
1
2
3
4
5
6
7
8
9
| .select_cus {position: relative;max-width: 500px;margin: 50px auto 0;}
.select_cus .trigger {display: flex;align-items: center;position: relative;height: 40px;padding: 0 36px 0 16px;border: 1px solid #D9D9D9;cursor: pointer;}
.select_cus .trigger:after {content:'';position: absolute;top: 0;right: 0;width: 38px;height: 38px;background:url('images/select_arr.png') center center no-repeat;background-size: contain;transform:scaleY(-1);}
.select_cus.active .trigger:after {transform:scaleY(1);}
.select_cus .trigger_txt {overflow: hidden;font-size: 14px;font-weight: 400;letter-spacing: -0.21px;color: #ACACAC;white-space: nowrap; text-overflow: ellipsis;}
.select_cus.select .trigger_txt {color: #222222;}
.select_cus .option {display: none;position: absolute;top: calc(100% - 1px);width: 100%;max-height: 203px;background: #fff;border: 1px solid #D9D9D9;z-index: 1;overflow-y: auto;}
.select_cus .option > li {padding:11px 16px;font-size: 14px;font-weight: 500;line-height: 1.3;color: #2C2C2C;cursor: pointer;}
.select_cus .option > li:hover {background: #F2F2F2;}
|
.trigger를 클릭하면 옵션 목록이 펼쳐지고, .select_cus에 active 클래스가 추가된다.
그리고, 옵션을 선택하면 select 클래스가 추가된다. 이와 관련하여 CSS를 작성했다.
jQuery 코드
 1
 2
 3
 4
 5
 6
 7
 8
 9
10
11
12
13
14
15
16
17
18
19
20
21
22
23
24
25
26
27
28
29
30
31
32
33
34
35
36
37
38
39
40
41
42
43
44
45
| $(window).on('load', function() {
selectCus();
})
function selectCus() {
$('.select_cus').each(function() {
const $select = $(this);
const $selectTrigger = $select.find('.trigger');
const $options = $select.find('.option');
const $hiddenInput = $select.find('.opt_val');
//select option 열기
$selectTrigger.click(function() {
$options.toggle();
$select.toggleClass('active');
$('.select_cus').not($select).find('.option').hide();
$('.select_cus').not($select).removeClass('active');
});
//option 선택
$options.find('li').click(function() {
const value = $(this).data('value');
const text = $(this).text();
$select.find('.trigger_txt').text(text);
$options.hide();
$select.removeClass('active');
//옵션 선택했을 때 클래스 추가
if (value != '') {
$select.addClass('select')
} else {
$select.removeClass('select')
}
// hidden 필드에 선택한 값을 설정
$hiddenInput.val(value);
});
});
//select 영역 외 다른곳을 누르면 select 닫힘
$(document).click(function(e) {
if (!$(e.target).closest('.select_cus').length) {
$('.select_cus .option').hide();
$('.select_cus').removeClass('active');
}
});
}
|
.trigger를 클릭하면 옵션 목록이 펼쳐지거나 숨겨지며, .select_cus에는 active 클래스가 토글 처리된다.
그리고, 다른 .select_cus 요소들의 옵션 목록은 닫히고 active 클래스가 제거된다.
.option을 선택했을 때 해당 옵션에 value 값이 있으면 .select_cus에 select 클래스가 추가되어 별도의 스타일을 적용했다.
.select_cus 영역 외에 다른 곳을 클릭하면 모든 .option 영역이 닫히도록 추가하여 기존 select 태그와 유사한 동작을 구현했다.
$select :
.select_cus 요소를 jQuery 객체로 저장한다.
$selectTrigger :
.trigger 요소를 jQuery 객체로 저장한다. 셀렉트 박스를 클릭하여 열기/닫기를 담당한다.
$options :
.option 요소를 jQuery 객체로 저장한다. 셀렉트 박스의 옵션들을 담고 있으며, 클릭 시 보여지거나 숨겨진다.
$hiddenInput :
.opt_val 요소를 jQuery 객체로 저장한다. 선택한 옵션의 값을 전달하기 위한 input hidden 태그다.
value :
클릭한 옵션의 data-value 속성값을 저장한다.
text :
클릭한 옵션의 텍스트 값을 저장한다.
$(’.select_cus’).each(function() { … }) :
페이지 내에 있는 모든 .select_cus 요소에 대해 동작을 설정한다.
$selectTrigger.click(function() { … }) :
.trigger를 클릭했을 때 동작을 설정한다.
$options.toggle() :
옵션 목록을 토글(보이기/숨기기) 한다.
$select.toggleClass(‘active’) :
.select_cus에 active 클래스를 토글(추가/제거) 한다.
$(’.select_cus’).not($select).find(’.option’).hide() / $(’.select_cus’).not($select).removeClass(‘active’) :
.select_cus 외의 다른 .select_cus에 대해 옵션 목록을 숨기고 active 클래스를 제거한다.
$options.find(’li’).click(function() { … }) :
옵션 목록의 각 항목(li)을 클릭했을 때 동작을 설정한다.
$select.find(’.trigger_txt’).text(text) :
클릭한 옵션의 텍스트를 셀렉트 박스의 .trigger_txt 영역에 표시한다.
$options.hide() :
옵션 목록을 숨긴다.
$select.removeClass(‘active’) :
.select_cus의 active 클래스를 제거한다.
if(value != ’’ ){ … } :
선택한 옵션에 value 값이 있으면 .select_cus에 select 클래스를 추가하고, 없다면 제거한다.
$hiddenInput.val(value) :
선택한 옵션값을 $hiddenInput value 값으로 설정한다.
$(document).click(function(e) { … }) :
클릭 된 요소가 .select_cus 내에 없다면, .select_cus 내의 옵션 목록을 숨기고 active 클래스를 제거한다. 셀렉트 박스 영역의 외부를 클릭하면 셀렉트 박스가 닫히는 기능을 구현했다.